Capturing a Drawing ART 220 · Digital Illustration · Session 09
Workhorse Collective
NameAbraham GarciaEmailabe@wrkhrs.co
ART 220 · Fall 2026
MeetsTue + Thu, 12:30 to 3:20TodaySession 09 · 09.22.2026
meaninglayer.com/course/digital-illustration
Session 09
Three things today, and you leave with most of Thursday done.
01 · Mark sheet
Twenty minutes. Fill a sheet with every mark you own, in ink and in pencil. We scan it and photograph it, and compare the two on screen. Your marks are the example for the rest of class.
02 · How to capture
Forty-five minutes. Scanning, photographing, resolution, and setting the black and white points. What a 9 by 12 drawing has to be to print at 18 by 24.
03 · Twelve thumbnails
Forty minutes. Two thumbnails for each of six starting points, with the words placed in every one. Most of what is due Thursday.
04 · Thursday, Sep 24
Your subject, twelve thumbnails with the one you are taking forward marked, and one larger study of the words. Uploaded before class.
Handed out today
One sheet to print, and one you fold.
Mark sheet/handouts/p2-mark-sheet.pdf
Twelve boxes, each naming a kind of mark: thin line, thick line, hatching, stipple, solid fill, dry brush, pencil, a torn edge, the smallest thing you can still read. Fill every box by hand. This is the first twenty minutes.
Thumbnail pagesletter paper, folded
Fold a letter sheet into eight frames, one page for each way of thinking about your subject. This is the last part of class, and it is most of what is due Thursday.
Your subjectthe last day to change it
One of the thirteen on the projects page, or one you bring today. After today the subject is fixed and you are drawing.
THE MARK SHEET IS ON THE CLASS PAGE UNDER SESSION 09.
The mark sheet
TWENTY MINUTES. EVERY MARK YOU OWN, ON ONE SHEET.
01 · Mark sheet, 20 minutes
Fill all twelve boxes. Do not be careful.
What goes inink and pencil both
The pens and brushes you actually have. If you only own one pen, change how hard you press and how fast you move. A mark you cannot repeat is not a mark you can use in a poster.
The two that matter mostbox 01 and box 12
Your thinnest line, and the smallest thing you can still read. Those are the two that break when the drawing is captured, and you are about to watch them break.
At the twenty minute markbring it up front
We scan a few at 600 and shoot the same sheets on a phone. Those files are the pictures for the next forty-five minutes.
PUT YOUR NAME ON IT. YOU ARE KEEPING THIS SHEET ALL SEMESTER.
Capturing a drawing
SCAN, PHOTOGRAPH, RESOLUTION, BLACK AND WHITE POINTS.
02 · The number
A 9 by 12 drawing has to become an 18 by 24 poster.
Double the size, halve the resolution. The pixels do not multiply when you scale a picture up. The ones you captured are all you will ever have.
An 18 by 24 poster at 300 ppi is 5400 by 7200 pixels. A 9 by 12 sheet is half that size on every side, so it has to be scanned at twice the resolution to arrive with the same pixels: 600.
Draw bigger than 9 by 12 and you can scan at less. Draw smaller and no scanner setting saves you.
Ask: what do you scan a 12 by 16 drawing at?
02 · Resolution
The same line, captured four ways, printed the same size.
72 ppiScreen resolution. Nothing else.150 ppiA newspaper, at best.300 ppiPrinting, at final size.600 ppiPrinting, with room to grow.
ONE DRAWING. ONE CROP. THE ONLY THING THAT CHANGED IS WHAT THE SCANNER WAS SET TO.
02 · Two ways to capture
A scanner and a phone are not the same picture.
ScannedFlat light. Square to the page. Paper reads as paper.PhotographedWarm light. Your own shadow. The page leans away.
SAME DRAWING. SAME MINUTE. THE FILE ON THE RIGHT TAKES AN HOUR TO FIX.
02 · At 200%
Scanned, at 200%The hatching is still separate lines.Photographed, at 200%The hatching is closing up, and the paper is a color now.
THIS IS THE COMPARISON YOU JUST MADE WITH YOUR OWN SHEET.
02 · If a scanner is not an option
How to photograph a drawing so the file is usable.
Light from both sidesor from a window, flat on
Two lamps at the same distance, or open shade outdoors. One lamp gives you a gradient across the sheet. Turn off the overhead light so you are not mixing two colors of light.
Get out of your own lightthe shadow is yours
Stand to the side and use the timer, or prop the sheet up on a wall and step back. Most bad captures are the photographer's shadow.
Square and farphone parallel to the paper
Hold the phone flat to the sheet, not tilted. Back up and zoom in rather than leaning over it, which bends the edges.
Lock the exposureand shoot the largest file
Tap and hold to lock focus and exposure. Turn off any filter. If your phone can save RAW or HEIF at full size, do that.
Include the whole sheetwith a margin
Leave paper visible on all four sides. You need the edges to straighten it, and the blank paper to set the white point.
02 · Black and white points
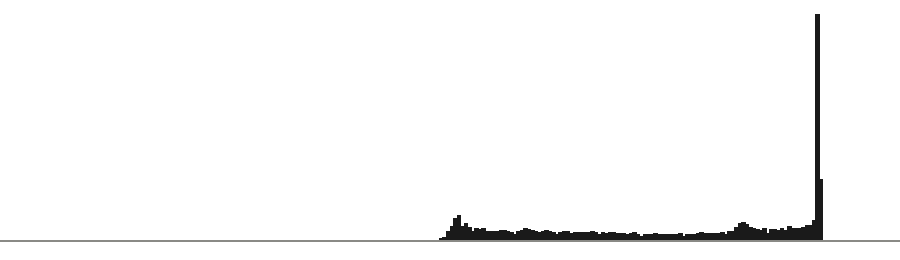
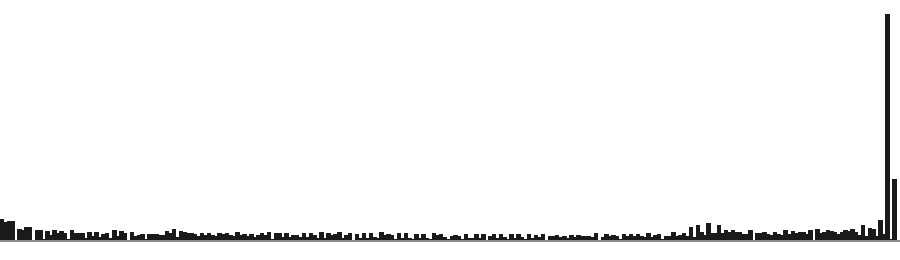
Every scan arrives short at both ends. You set them.
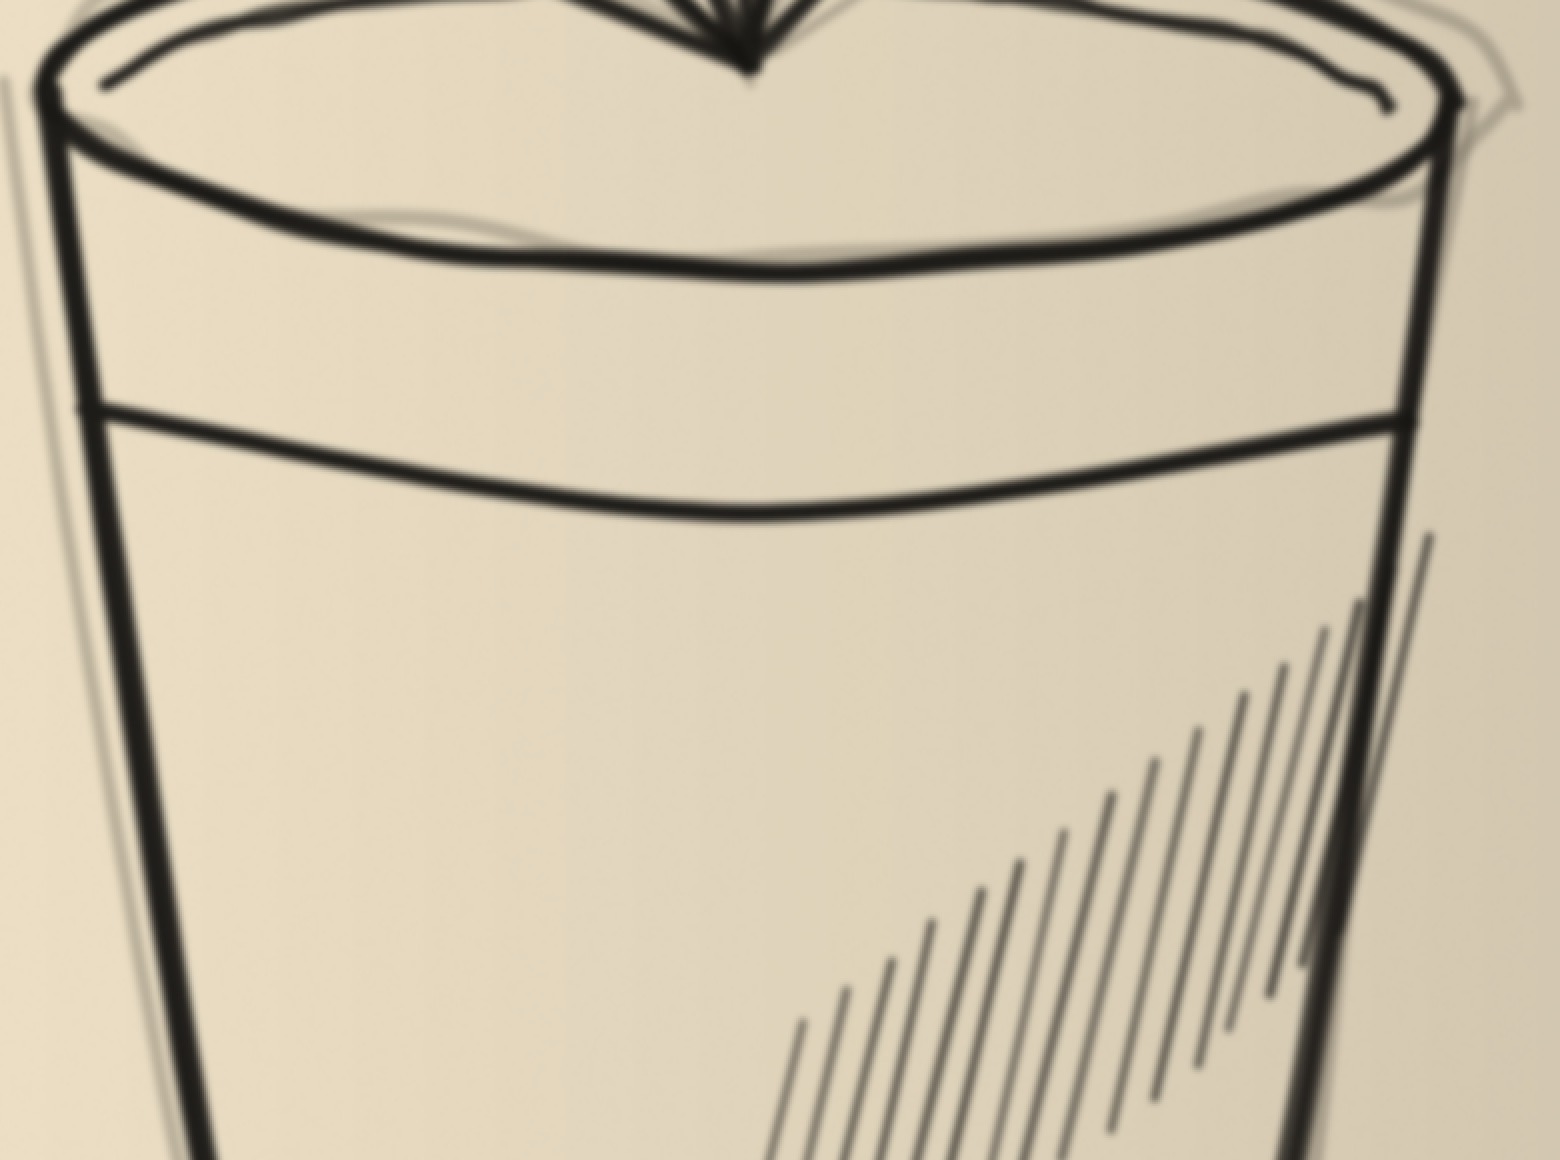
Off the scannerThe darkest ink is mid gray. The paper is not quite white. The histogram stops short of both ends.Points setInk is black, paper is white, and the pencil under it is still there.
02 · The order of operations
Five moves, in this order, every time.
01 · Straighten and cropbefore anything else
Rotate until the sheet edges are square, then crop to the drawing. Everything after this assumes the file is straight.
02 · Set the white pointthe paper
Pull the white slider down to where the paper starts. The paper goes white and most of the dust goes with it.
03 · Set the black pointthe ink
Pull the black slider up to where the ink starts. Stop when the thin lines are solid. Past that you eat your own hatching.
04 · Clean what is leftby hand
A white brush on the specks the levels did not take. Do not use a filter for this; filters take marks you meant to keep.
05 · Separate the lineits own layer
The line on one layer over a white ground, so color can go underneath it. That is the file you color on October 1.
YOU RUN THIS LIST ON OCTOBER 1, WHEN YOU SCAN YOUR FINISHED DRAWING.
02 · What survives
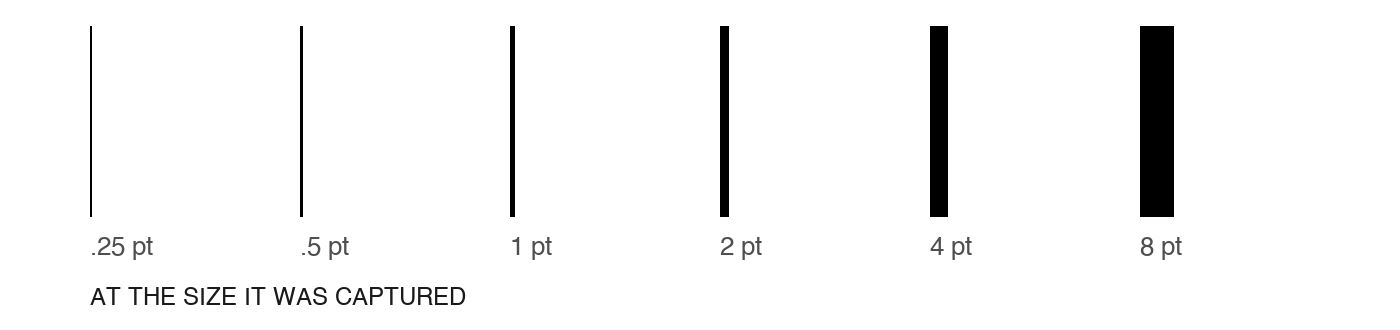
The thinnest line you can draw may not be a line you can print.
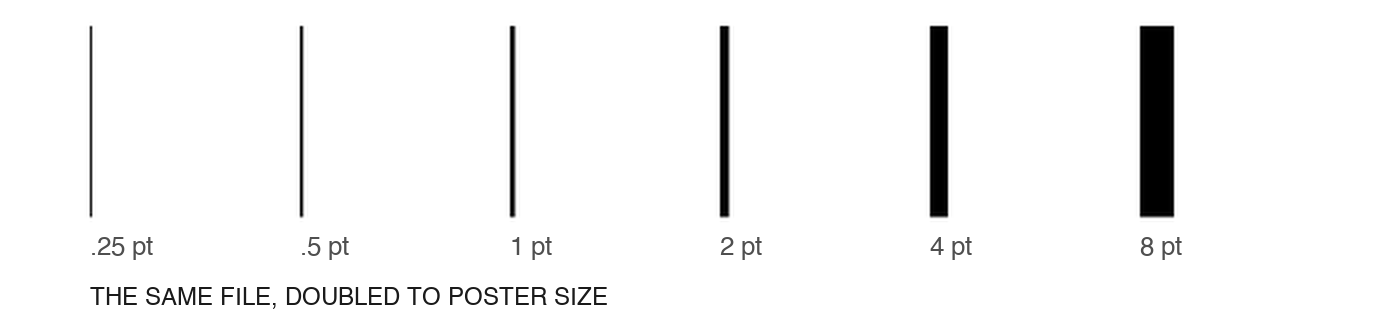
Top: six weights at the size they were captured. Below: the same file doubled to poster size. Look at the two thinnest. They do not disappear, they go gray and uneven, because at 300 ppi a quarter point line is about one pixel and there is nothing to enlarge. The heavy weights double cleanly.
A gray, uneven line is a problem later: setting the black point turns it patchy, and a screenprint has a floor of its own, where a line thinner than about a point breaks up and a gap thinner than that fills in with ink.
You are not being asked to draw heavy. You are being asked to know which of your marks are at the edge, and to use them on purpose.
02 · What to save
Save the capture once, and never work on it.
The captureTIFF or PNG, untouched
Straight off the scanner, at 600, before you change anything. Rename it and leave it alone. If your clean-up goes wrong, this is what you go back to.
The working filePSD or AI, layers kept
Everything you do happens here: levels as an adjustment layer, the line on its own layer, color underneath. Layers named.
JPEGfor sending, not for working
JPEG throws away detail to make the file small, and it does its worst damage exactly where a drawn line meets white paper. Never scan to JPEG, and never save a working file as one.
On Thursdaybring the file, not just the paper
Your thumbnails can be photographed. The drawing you take forward gets captured properly in class on Tuesday Sep 29.
Corita KentA nun in Los Angeles who made posters out of words, three colors at a time, and printed enough for everyone.
ARTIST OF THE DAY · 1918 TO 1986 · CORITA.ORG
03 · Corita Kent
The words are the poster.
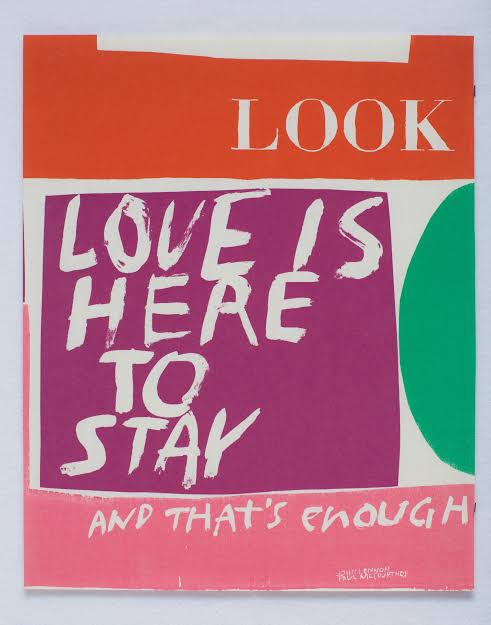
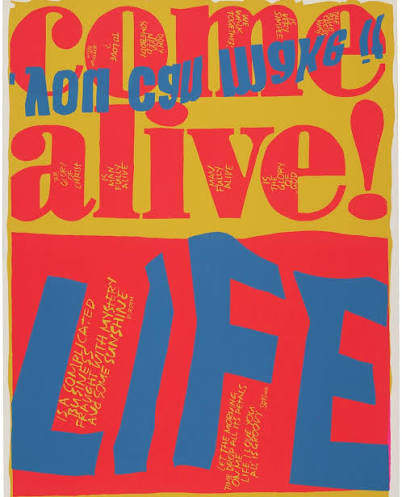
Corita Kent · love is here to stay, 1960sA magazine masthead, a lyric, and the letters cut by hand. Three colors and the paper.Corita Kent · come alive, 1967A soft drink slogan and a magazine name. The small handwriting lives inside the big letters.
SHE TOOK WORDS FROM SIGNS, PACKAGES AND SONGS. THE DRAWING IS THE LETTERING.
03 · Corita Kent
Cut the letters, or write them. Never type them.
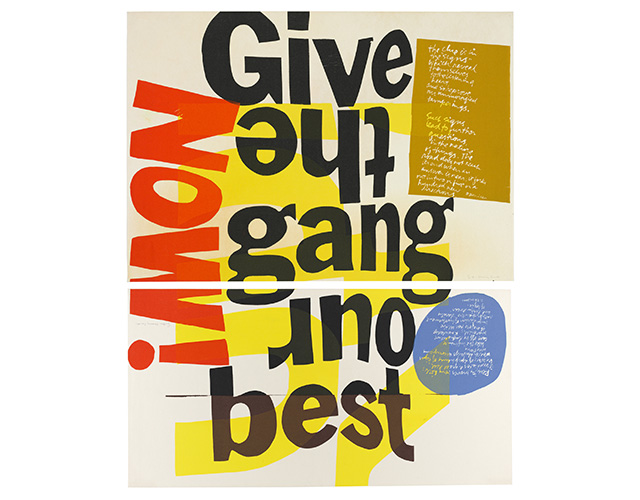
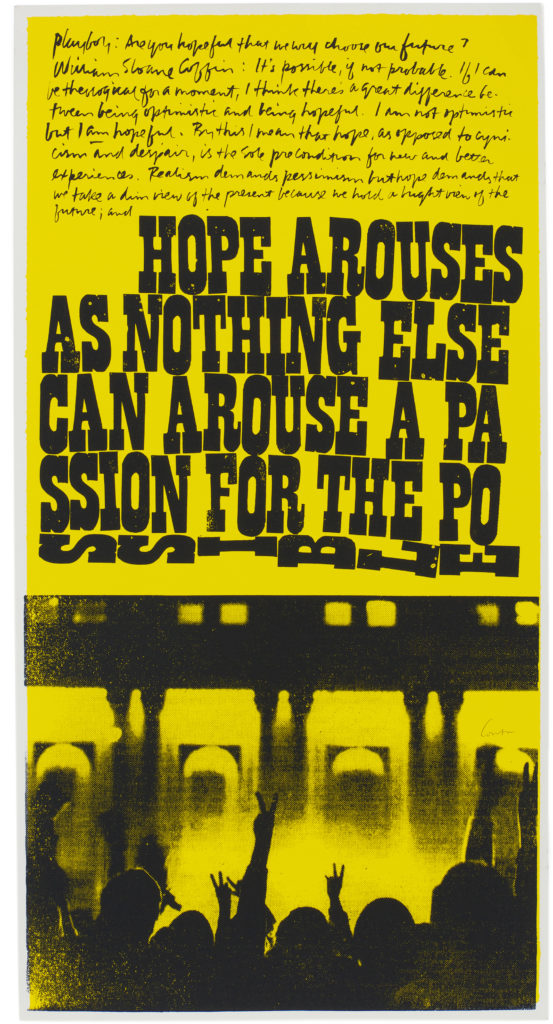
Corita Kent · give the gang our best, 1960sLetters cut from paper and turned sideways. Reading it takes a second, and that second is the poster.Corita Kent · hope arouses, 1969Block letters as big as the sheet, a line of handwriting above, a crowd below. Two colors.
FOR YOUR POSTER: LETTERS DRAWN OR CUT ON PAPER, CAPTURED WITH THE DRAWING.
03 · Corita Kent
She taught it the way we are doing it today.
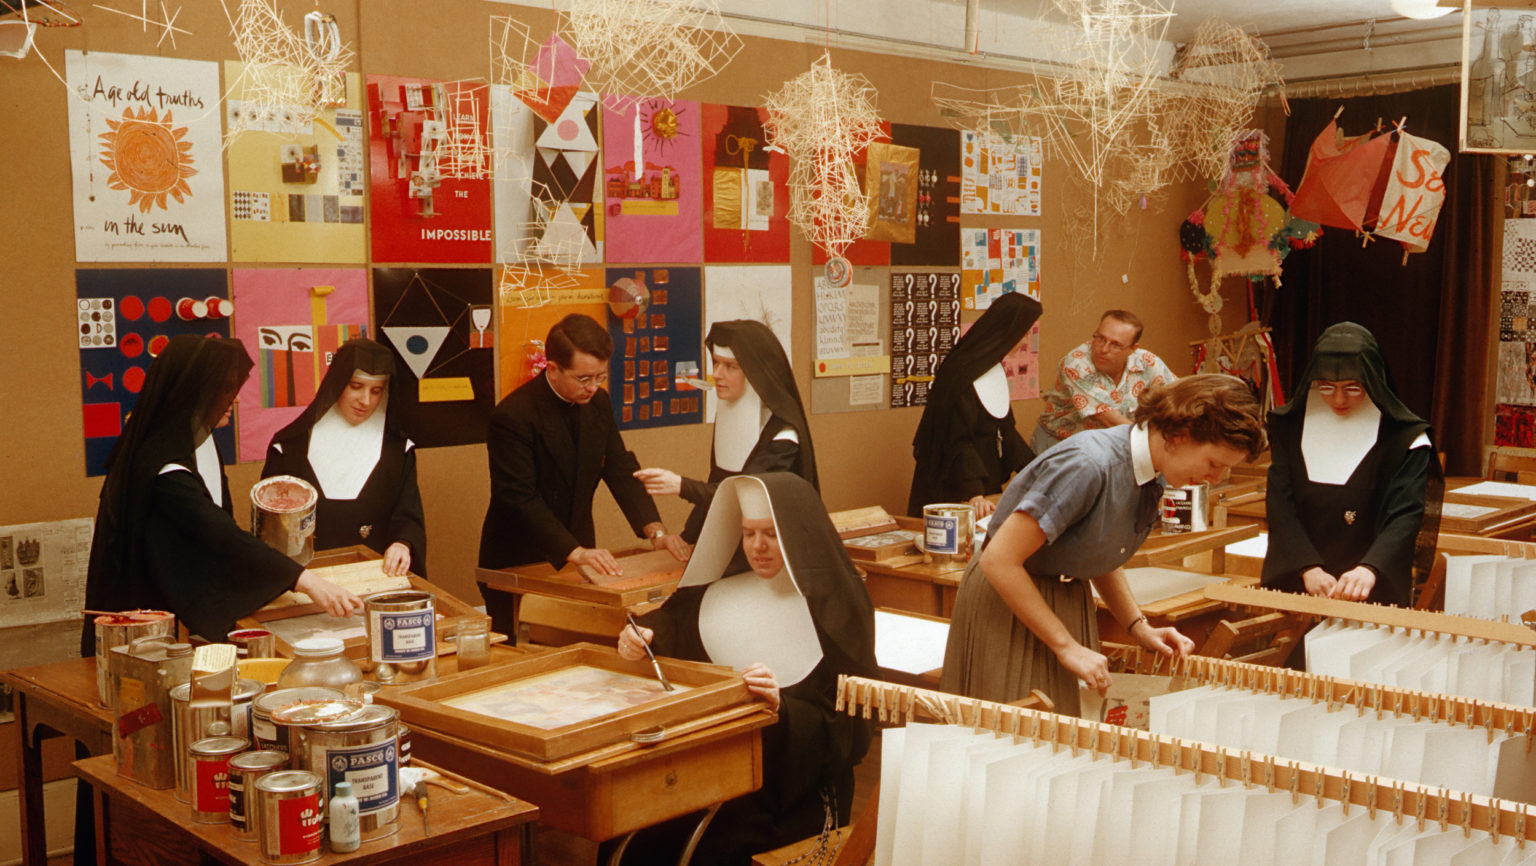
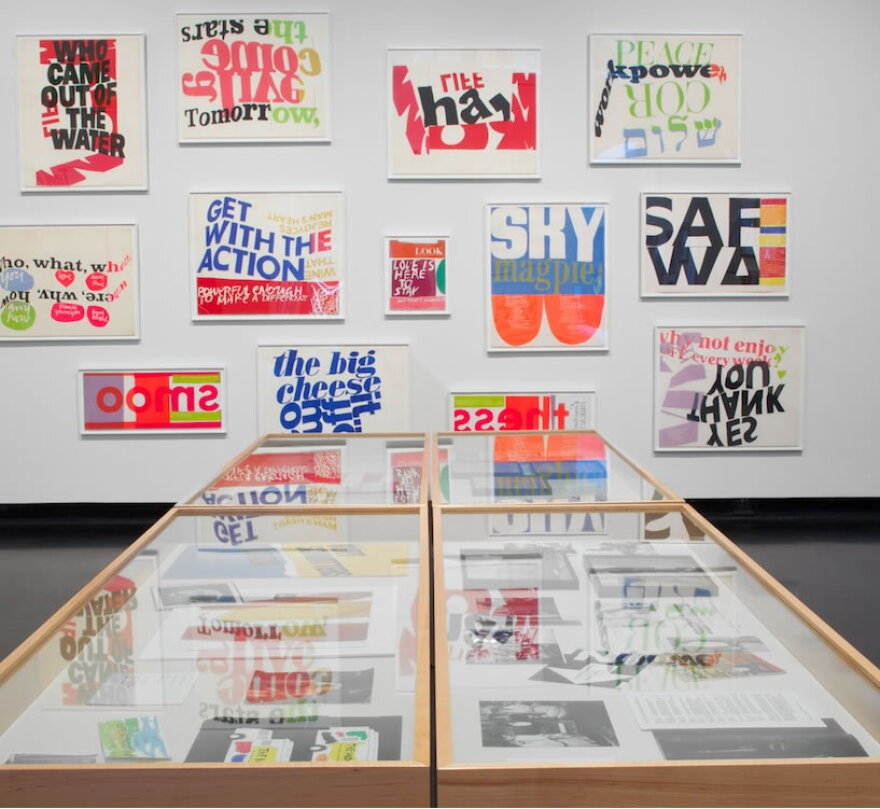
Immaculate Heart art department, 1955Long tables, everyone working at once, the wall full of the last week's prints.A wall of her printsDozens of small sheets, each one a few words and a few colors. Quantity was the method.
RULE 8: DO NOT TRY TO CREATE AND ANALYZE AT THE SAME TIME. THEY ARE DIFFERENT PROCESSES.
ThumbnailsThe thinking part of the project. Five ways through one subject, then refine the ones you liked.
FORTY MINUTES. OBJECT, SYMBOL, PATTERN, WORDS, SCENE. THEN REFINE.
04 · Thumbnails, 40 minutes
This is the thinking part. Work through your subject one way at a time.
The paperfold, do not print
Fold a letter sheet in half, in half again, then once the other way, and hold it wide. Eight tall frames a page, each 2.75 by 4.25. One page per way of thinking.
01 · Objectone page
One thing from the subject, drawn straight. The rock in Sinners. A pair of shoes.
02 · Symbolone page
A stand-in. What the subject means rather than what it looks like.
03 · Patternone page
One mark repeated until the repeating is the picture. Your mark sheet is full of candidates.
04 · Wordsone page
The title does the drawing. Try it even if you already know you are drawing a picture.
05 · Sceneone page
Last, because it is the one everyone wants to start with. A moment with more than one thing in it.
Then refinea fresh sheet
Take the ones you liked, from any page, and draw them again, larger and better. Mark the one you are taking forward.
04 · 01 · Object
One thing from the subject, and it is the whole poster.
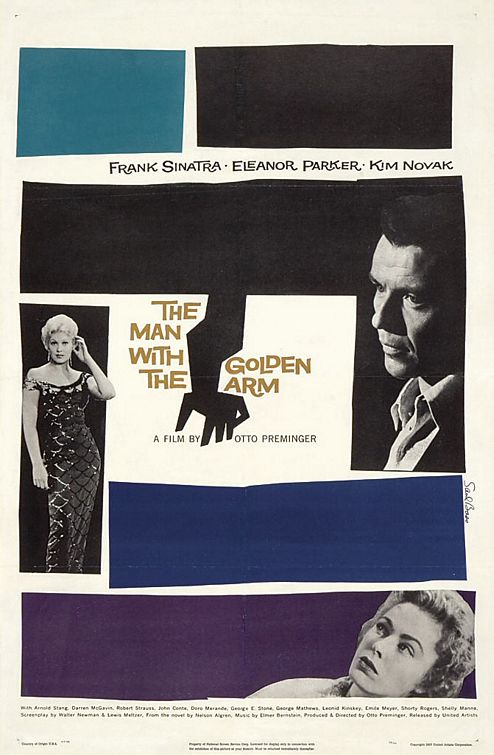
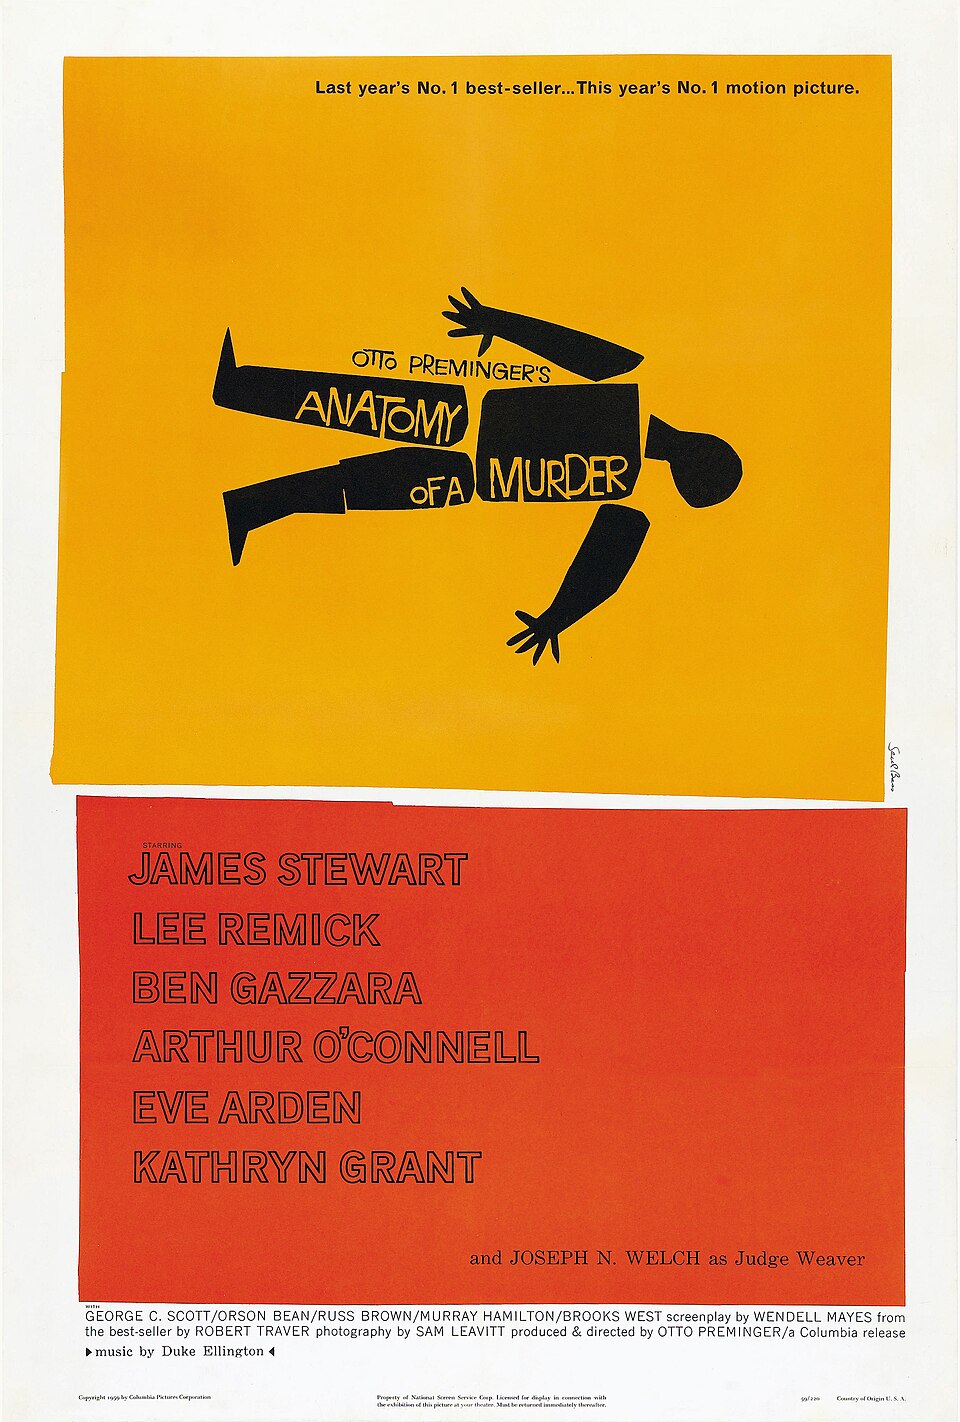
Saul Bass · The Man with the Golden Arm, 1955A film about addiction. One arm. Nothing else got in.Saul Bass · Anatomy of a Murder, 1959A courtroom film. A body, cut into the pieces the title promises.
THE OBJECT PAGE. EIGHT THINGS FROM YOUR SUBJECT, ONE PER FRAME, DRAWN STRAIGHT.
04 · 02 · Symbol
A stand-in for what the subject means.
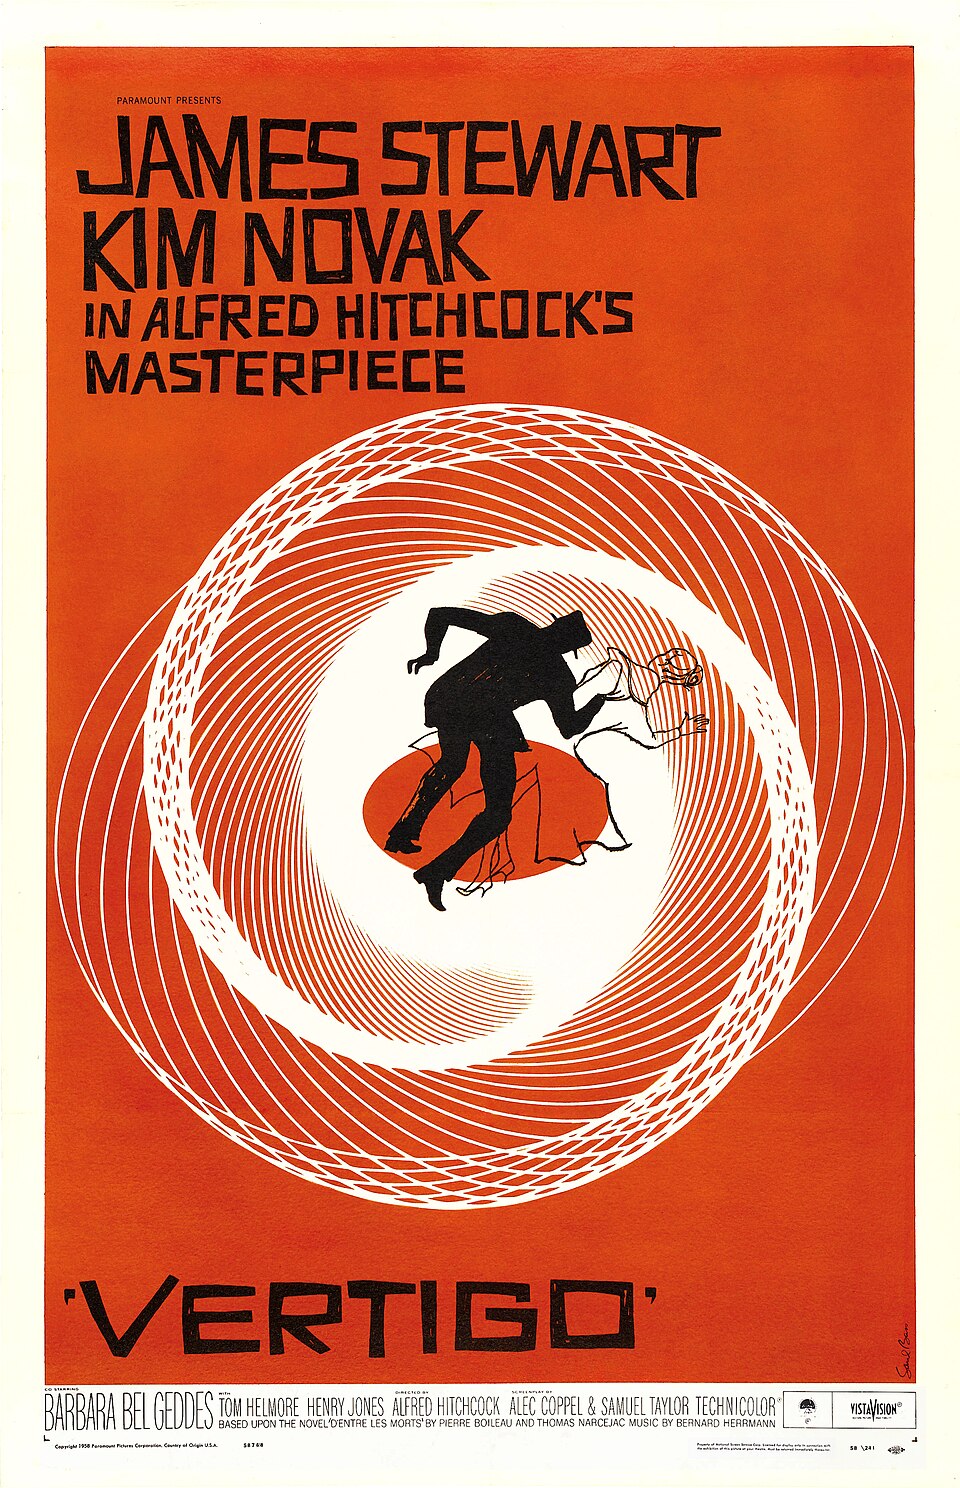
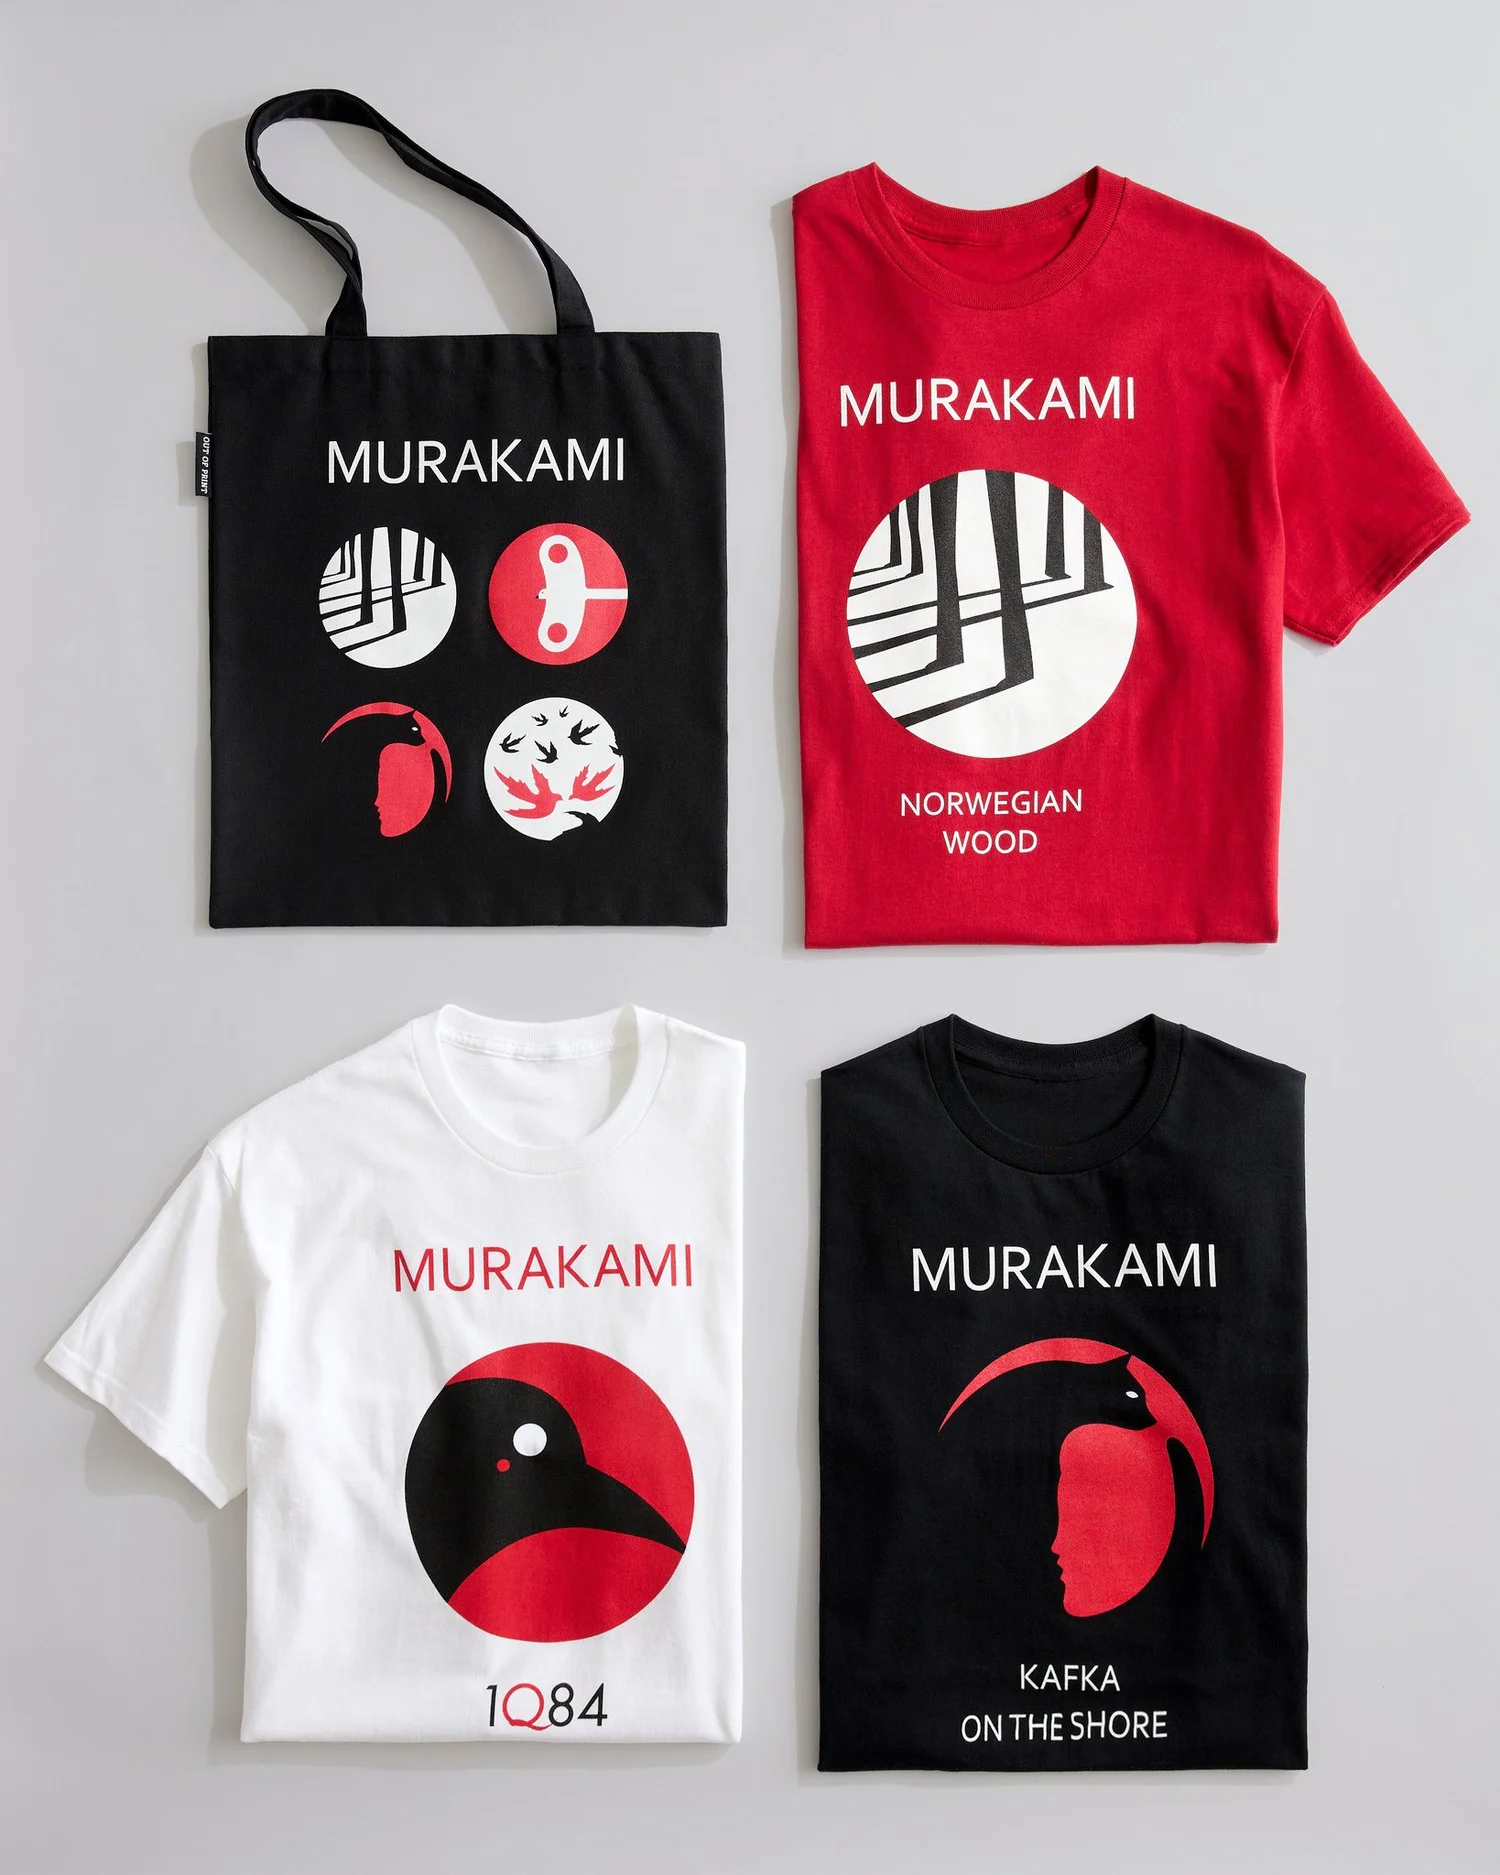
Saul Bass · Vertigo, 1958Vertigo is a feeling. The spiral is the feeling; the figures are small.Noma Bar · Murakami covers, VintageFour novels, four symbols. Each is one shape and the second picture inside it.
THE SYMBOL PAGE. WHAT THE SUBJECT MEANS, NOT WHAT IT LOOKS LIKE.
04 · 03 · Pattern
One mark repeated until the repeating is the picture.
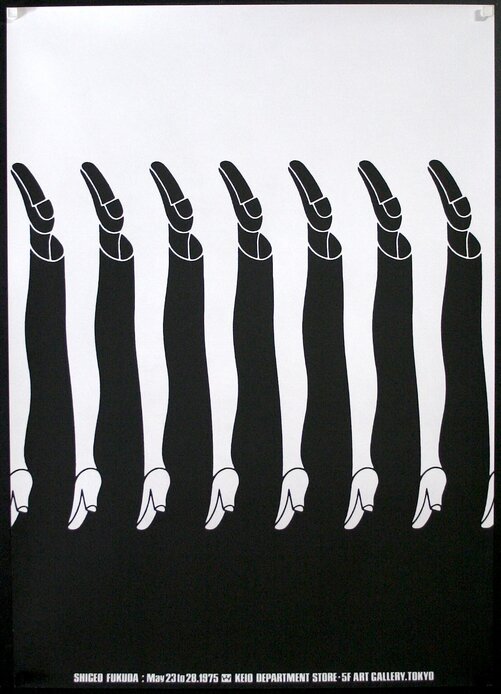
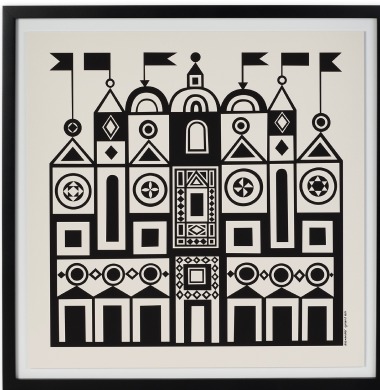
Shigeo Fukuda · Keio Department Store, 1975One leg, repeated. The white between the black legs is a second row of legs. The pattern is the whole poster.Alexander Girard · Environmental Enrichment panel, 1972Circles, triangles and arches, repeated in rows until they are a building. No drawing, only the repeat.
THE PATTERN PAGE. PICK A MARK, PICK A RULE, AND LET THE REPEAT MAKE THE SHAPE.
04 · 04 · Words
The title does the drawing.
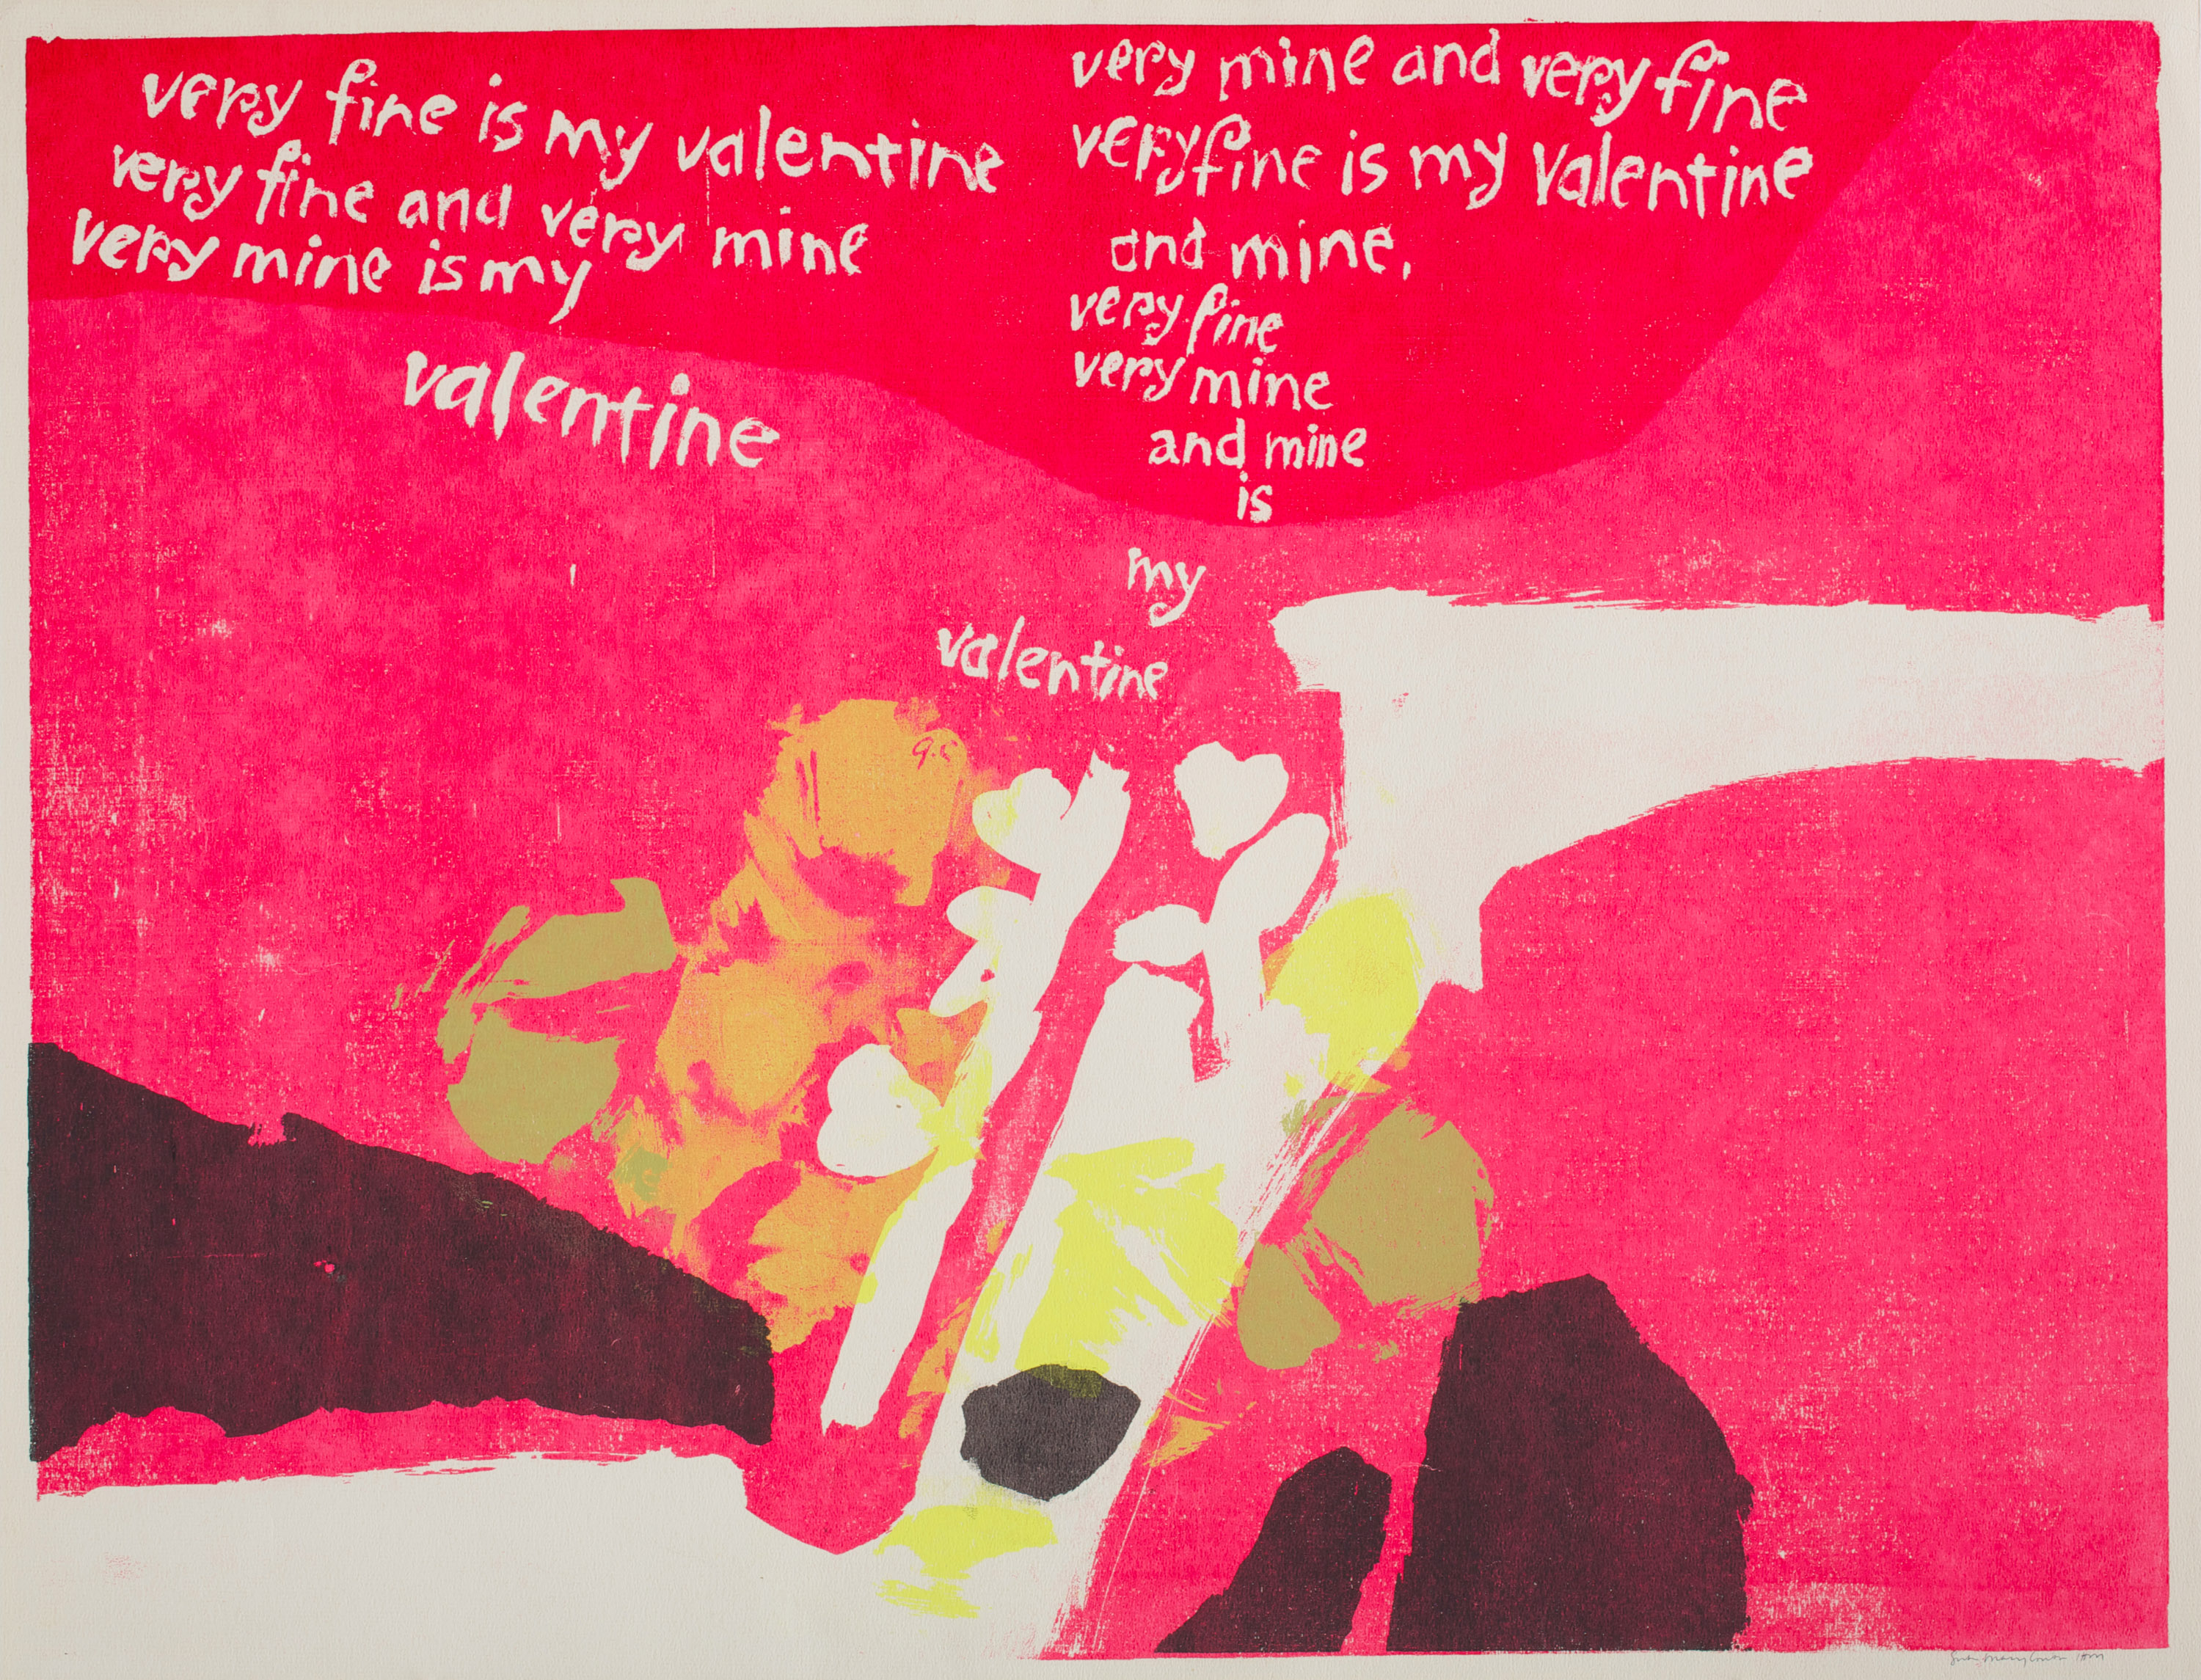
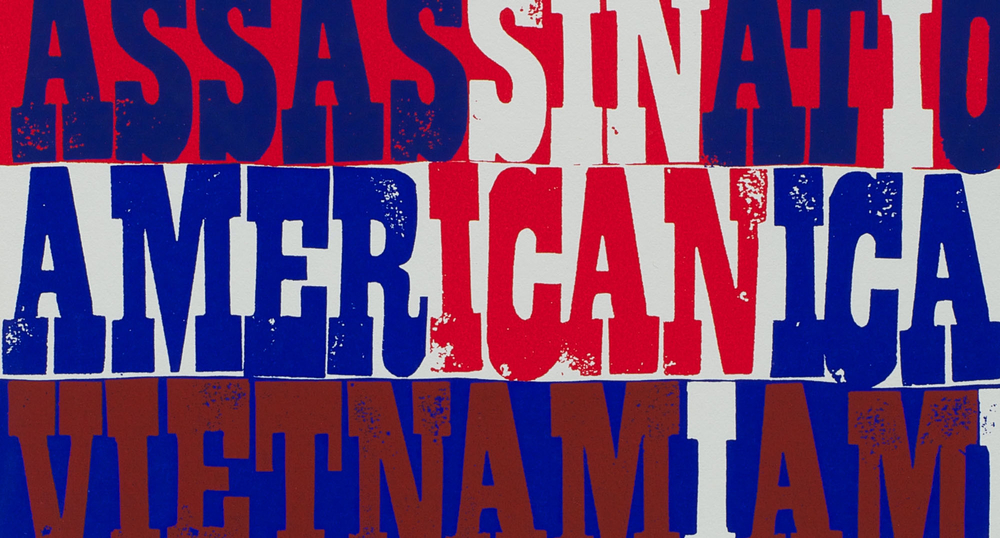
Corita Kent · very fine is my valentine, 1960sThe words are written by hand, three colors, screenprinted. There is no picture apart from the writing.Corita Kent · american sampler, 1969Three words in three colors, the letters cut and shoved together until the words are the image. Nothing else on the sheet.
THE WORDS PAGE. DRAW THE TITLE BY HAND, BIG ENOUGH TO BE THE PICTURE.
04 · 05 · Scene
A moment with more than one thing in it, and still one read from across the room.
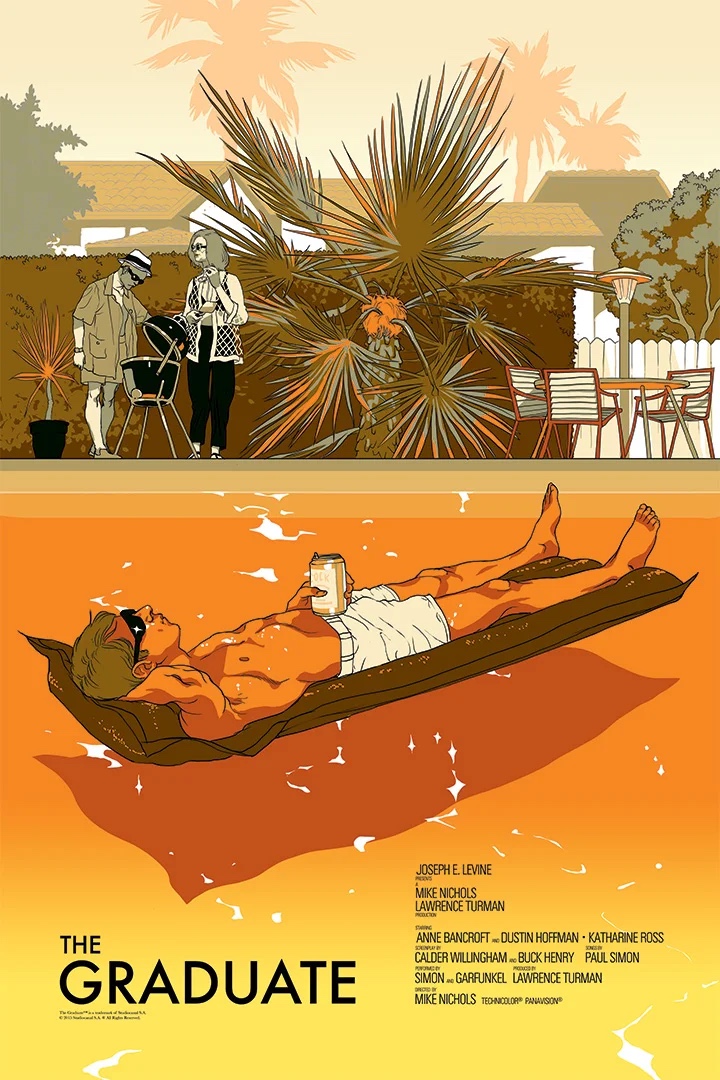
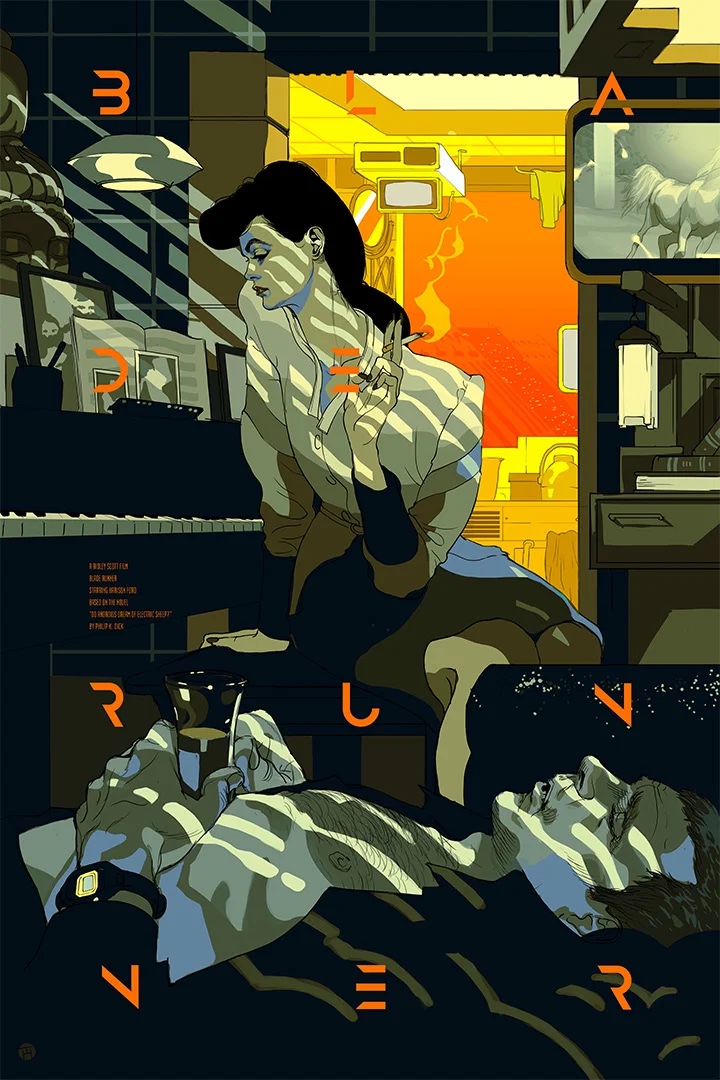
Tomer Hanuka · The Graduate, MondoA pool, a raft, a party going on without him. The whole film is in the gap between the two halves.Tomer Hanuka · Blade Runner, MondoRain, neon, two faces and a street. Many things, one color plan, and the title drawn into the frame.
THE SCENE PAGE, LAST. A SCENE NEEDS ONE IDEA AS MUCH AS AN OBJECT DOES.
04 · Then · Refine
Pick the ones you liked. Draw them again, bigger.
Go back through the five pages and mark the frames that still look good to you. Three to five is normal. They can all come from one page.
Fold a fresh sheet in half twice and hold it tall: four frames, each the shape of the poster. Draw each pick again in a bigger frame, fixing what the small one got wrong, with the words placed at their real size.
Circle the one you are taking forward. That sheet, plus the five pages, is what you upload Thursday.
Ask: does your pick still work with the title at full size?
04 · Next steps
You have a thumbnail. Now start asking the rest of the questions.
Where do the words go? Look at the three frames. Plan them in, or they end up parked at the bottom. Sometimes they are the picture.
Drawn or set? Are you lettering the title by hand, or setting it in a font? Decide now, because it changes the drawing.
Which three colors? Light, middle and dark. Where does each one go?
Which marks? Look at your mark sheet. Which of those twelve is this poster made of?
What does the drawing need to be? One sheet, 9 by 12 or bigger, with everything above on it. That is the next two weeks.
Due Thursday
Thursday Sep 24, uploaded before 12:30.
01 · Your subject
One line: which of the thirteen, and the exact words your poster has to carry, in order of size. Check the dates on the venue's own page.
02 · Your thumbnails
Photographed or scanned: the five folded pages and the sheet where you refined the ones you liked. Words in every frame, the one you are taking forward marked.
03 · One words study
The words from that thumbnail at a larger size: drawn letters, or your chosen font printed out and placed on the sketch.
04 · Then, Oct 1
The finished drawing on paper, captured and cleaned in class. Between Thursday and then, you are drawing.
The capture is the drawingEverything after Thursday runs on the file you make from the paper. A drawing you cannot capture is a drawing nobody sees.
 meaninglayer.com/course/digital-illustration